Oreo Icebox Cake

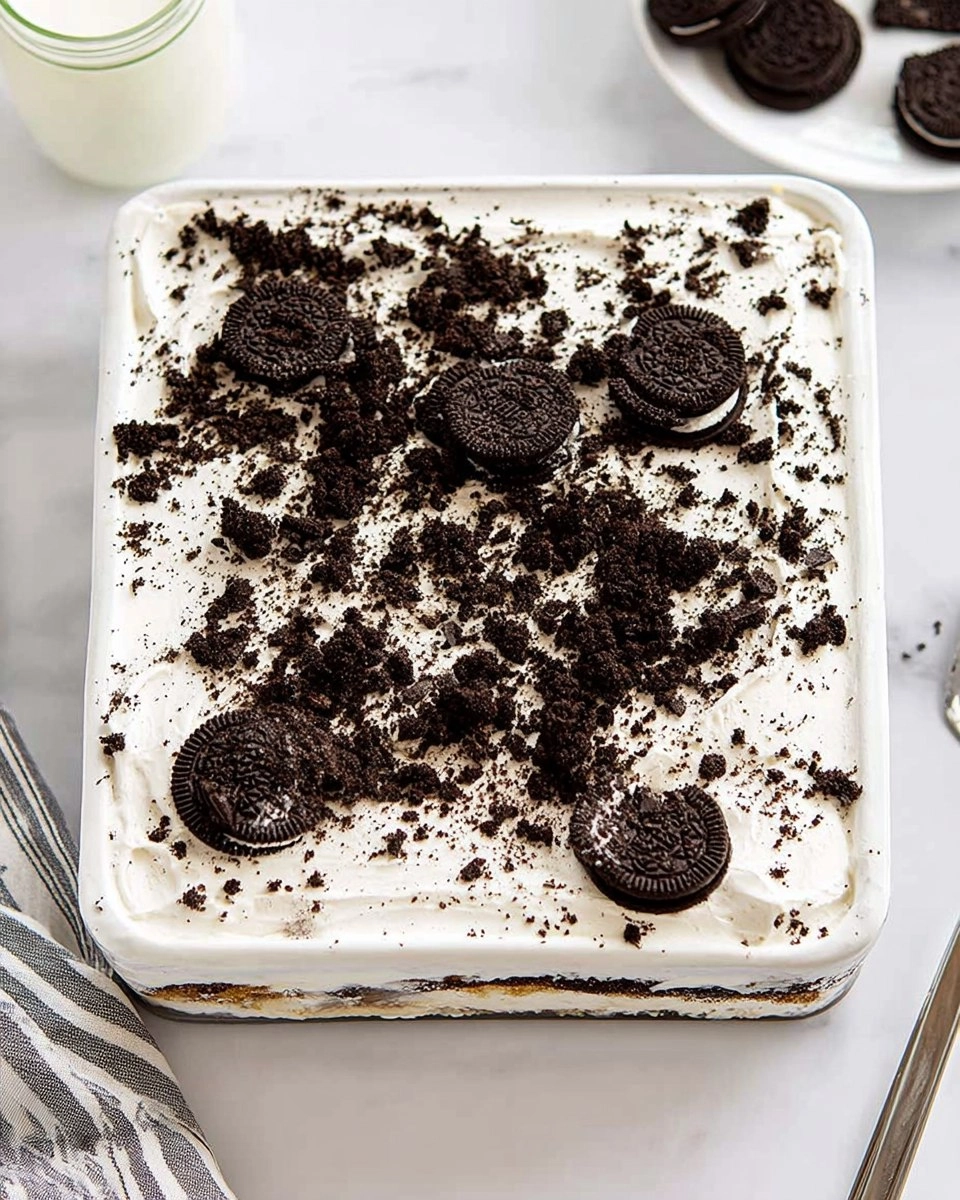
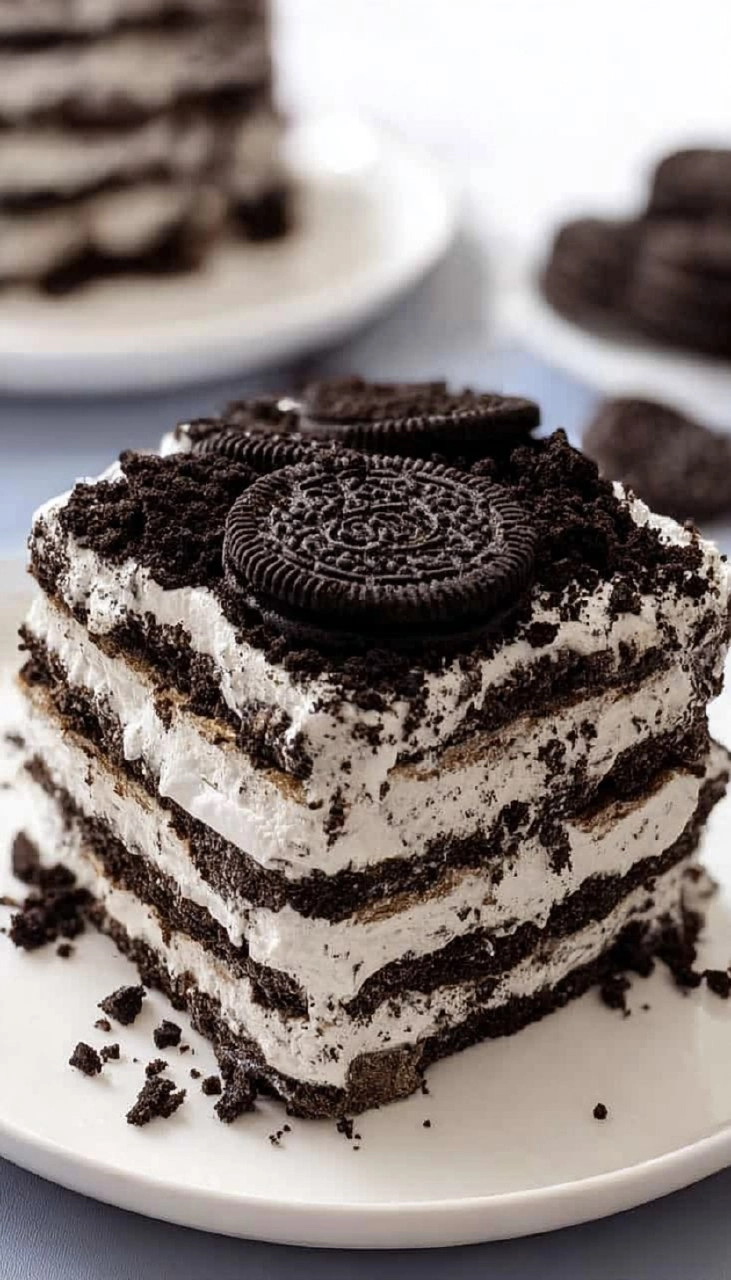
Oreo Icebox Cake is a delightfully simple no-bake dessert that whips together layers of creamy goodness and the beloved flavors of Oreos. This cake isn’t just pretty to look at; it combines the crunch of chocolate cookies with clouds of whipped cream for a dessert that feels like a hug in every bite. Imagine lifting a spoonful and feeling the soft cream blend seamlessly with the slightly softened cookies—it’s an experience that takes mere moments to prepare but lasts forever in your memory.
Table of Contents
I first stumbled upon this recipe during a summer gathering when the heat made baking feel like a heavy chore. One bite of this cool, creamy treat made me feel like I was floating on a cloud, and I knew I had to recreate it for my family. The beauty of Oreo Icebox Cake lies not only in its taste but in its convenience. It requires minimal effort, making it a fantastic option for parties, potlucks, or just an indulgent weeknight treat. You’ll be pleased to discover how quickly it comes together, and just as thrilled when you see the smiles it brings!
Why You’ll Love This Recipe
- Simple & Quick: With just a few steps and minimal prep time, this dessert comes together in a flash, making it perfect for busy days or last-minute gatherings.
- Irresistible Flavor: The combination of rich chocolate cookies and fluffy sweet cream creates a harmonious balance that’s simply hard to resist.
- Eye-Catching Appeal: The layered look of the cake, topped with crushed Oreo cookies, not only tastes good but also makes a striking presentation that’s sure to impress your guests.
- Flexible Serving: Perfect for any occasion—afternoon snack, birthday party, or holiday dessert—this treat can easily adapt to fit any celebration or chill session.
- Diet-Friendly Options: You can swap regular Oreos for gluten-free varieties or use dairy-free cream cheese and whipping cream for a lactose-free version.
Ingredients You’ll Need
- 48 Oreo cookies: The star of the show! Their chocolatey goodness adds an irresistible crunch and flavor. You can use regular or double-stuffed Oreos depending on how rich you want it to be.
- 4 ounces cream cheese, softened: This adds richness and structure to the fluffy whipped cream. Use full-fat for the best flavor; low-fat options won’t yield the same creaminess.
- 2 ½ cups (595 g) heavy whipping cream, cold: It’s essential for creating that light, airy whipped cream layer. Make sure it’s cold for the best whipping results; nothing beats the texture of freshly whipped cream.
- ½ cup (62.5 g) confectioners’ sugar: This sweetener helps to stabilize the whipped cream and adds just the right amount of sweetness without being overbearing.
- 1 teaspoon vanilla extract: For depth of flavor, always use pure vanilla extract if possible, as it enhances the overall taste.
- Crushed Oreo cookies: For topping, these crumbles not only look great but also add an extra layer of Oreos that everyone will enjoy.
How to Make Oreo Icebox Cake
- Chill the Mixer Bowl: Begin by placing the bowl of your stand mixer along with the whisk attachment in the freezer for about 15 to 20 minutes. This step makes whipping cream much easier and quicker.
- Make the Whipped Cream Mixture: In the chilled bowl, beat the softened cream cheese until it’s perfectly smooth. Then, add the cold heavy whipping cream, confectioners’ sugar, and the vanilla extract. Mix it all together on medium-high speed until stiff peaks form. Just don’t overbeat—stop when it’s thick but still fluffy.
- Start Layering: Spread a thin layer of your whipped cream mixture into the bottom of an 8×8-inch baking dish. It doesn’t have to be perfect; just a nice base to hold your cookies.
- Arrange the Oreo Cookies: Place a single layer of Oreo cookies over the whipped cream. Feel free to break any cookies to fit the space nicely—this doesn’t have to be exact!
- Spread More Whipped Cream: Take about one-third of the remaining whipped cream mixture and spread it evenly over the layer of Oreos, using a spatula to smooth it out.
- Repeat the Layers: Continue to repeat the layers two more times—Oreo cookies and whipped cream—until you use everything, finishing off with a final layer of whipped cream on top.
- Top It Off: Sprinkle the top generously with crushed Oreo cookies. This adds a lovely decorative touch.
- Chill the Cake: Cover the dish tightly with plastic wrap. Let it chill in the refrigerator for at least 6 to 8 hours, or preferably overnight. As it sits, the cookies will soften, creating that wonderful cake-like texture.
- Slice and Serve: For clean slices, place the cake in the freezer for 20 to 30 minutes prior to cutting. Serve cold and watch it disappear!
Storing & Reheating
Store any leftovers of Oreo Icebox Cake in an airtight container in the refrigerator for up to 4 days. Ensure you’ve tightly covered any parts exposed to air to maintain freshness. You can also freeze the cake for up to 3 months. To freeze, cut into individual servings and wrap each slice tightly in plastic wrap, followed by aluminum foil. To enjoy, simply thaw in the refrigerator overnight. While some texture may change after freezing, serving it slightly chilled will refresh its flavors and keep it delicious.
Chef’s Helpful Tips
- To get the perfect whipped cream, always start with cold heavy cream and a chilled bowl—this will help achieve those stiff peaks effortlessly.
- A common mistake is overmixing the whipped cream, which can lead to a grainy texture. Stop mixing once you see those stiff peaks form.
- Feel free to spice things up! Add a layer of fresh fruit, like sliced strawberries or raspberries, between the Oreo layers for a refreshing twist.
- If desired, you can swap in different flavored cookies, like mint Oreos or peanut butter ones, for a new taste experience.
- For a more decadent dessert, consider drizzling some chocolate syrup on top before serving.
Whether you’re looking for a laid-back dessert for a midweek treat or a dazzling centerpiece for your next gathering, Oreo Icebox Cake is your go-to recipe. It offers an uncomplicated way to satisfy those sweet cravings without spending an entire day in the kitchen. Each layer offers a delightful experience that’s as easy to make as it is to enjoy.
So don’t hesitate—grab your ingredients and whip up this fabulous dessert today! You’ll find it mingles well with laughter and good times and will undoubtedly leave everyone asking for seconds.
Recipe FAQs
How long does Oreo Icebox Cake need to chill?
The cake should chill for at least 6 to 8 hours, but overnight is best. This resting time allows the Oreos to soften and meld with the whipped cream, creating that delicious cake-like texture.
Can I use different cookies for this recipe?
Absolutely! While Oreos are the star of this recipe, you can experiment with other cookie varieties. Vanilla wafers or even chocolate graham crackers can serve as a fun alternative.
How can I make this dessert dairy-free?
To make a dairy-free version, substitute the cream cheese with a dairy-free cream cheese alternative and use coconut cream as the whipped topping. Make sure to choose dairy-free Oreo cookies as well!
What should I do if my whipped cream isn’t thickening?
Ensure that your heavy cream is cold, and make sure your mixing bowl and beaters are also cold. If still not thickening, you can add a little more confectioners’ sugar for stabilization. Remember, don’t overmix as it can go from fluffy to grainy quickly!
PrintMore Desserts & Appetizers Recipes
- Easy Coconut Cake
- Strawberry Cake Truffles
- Cheese Twists with Puff Pastry
- Pineapple Cake
- Cinnamon Swirl Banana Cake
Did You Enjoy Making This Recipe? Please rate this recipe with ⭐⭐⭐⭐⭐ or leave a comment.
📖 Recipe Card
Oreo Icebox Cake
- Prep Time: 15 minutes
- Cook Time: No cooking required
- Total Time: 0 hours
- Yield: 9 servings 1x
- Category: Desserts
- Method: No-Bake
- Cuisine: American
Description
This Oreo Icebox Cake is a delightful, no-bake treat layered with creamy whipped filling and crunchy Oreo cookies. Ideal for gatherings, this simple recipe allows the flavors to meld beautifully in the fridge, creating a cake that’s rich, sweet, and incredibly easy to prepare.
Ingredients
- 48 oreo cookies
- 4 ounces cream cheese, softened
- 2 ½ cups heavy whipping cream, cold
- ½ cup confectioners' sugar
- 1 teaspoon vanilla extract
- crushed oreo cookies
Instructions
- Chill the bowl and whisk attachment of a stand mixer in the freezer for 15 to 20 minutes.
- In the chilled bowl, beat the cream cheese until smooth. Add the heavy whipping cream, confectioners’ sugar, and vanilla extract. Beat until stiff peaks form, being careful not to overbeat.
- Spread a thin layer of the whipped cream mixture in the bottom of an 8×8-inch baking dish.
- Layer Oreo cookies over the whipped cream, breaking some as needed to fit.
- Spread about one-third of the remaining whipped cream mixture evenly over the cookies.
- Repeat the layers two more times, finishing with a layer of whipped cream on top.
- Sprinkle crushed Oreo cookies on the top.
- Cover and refrigerate for at least 6 to 8 hours, or overnight, to allow the cookies to soften.
- Serve cold, and for cleaner slices, freeze for 20 to 30 minutes before cutting.
Notes
Ensure the heavy whipping cream is very cold for best results in whipping.
You can add toppings such as chocolate shavings or additional Oreo pieces for extra flair.
For added flavor, a layer of chocolate or caramel sauce can be drizzled between Oreo layers.
Nutrition
- Serving Size: 1 slice
- Calories: 310
- Sugar: 20g
- Sodium: 200mg
- Fat: 24g
- Saturated Fat: 14g
- Unsaturated Fat: 7g
- Trans Fat: 0g
- Carbohydrates: 26g
- Fiber: 1g
- Protein: 3g
- Cholesterol: 50mg