Homemade Cherry Crisp

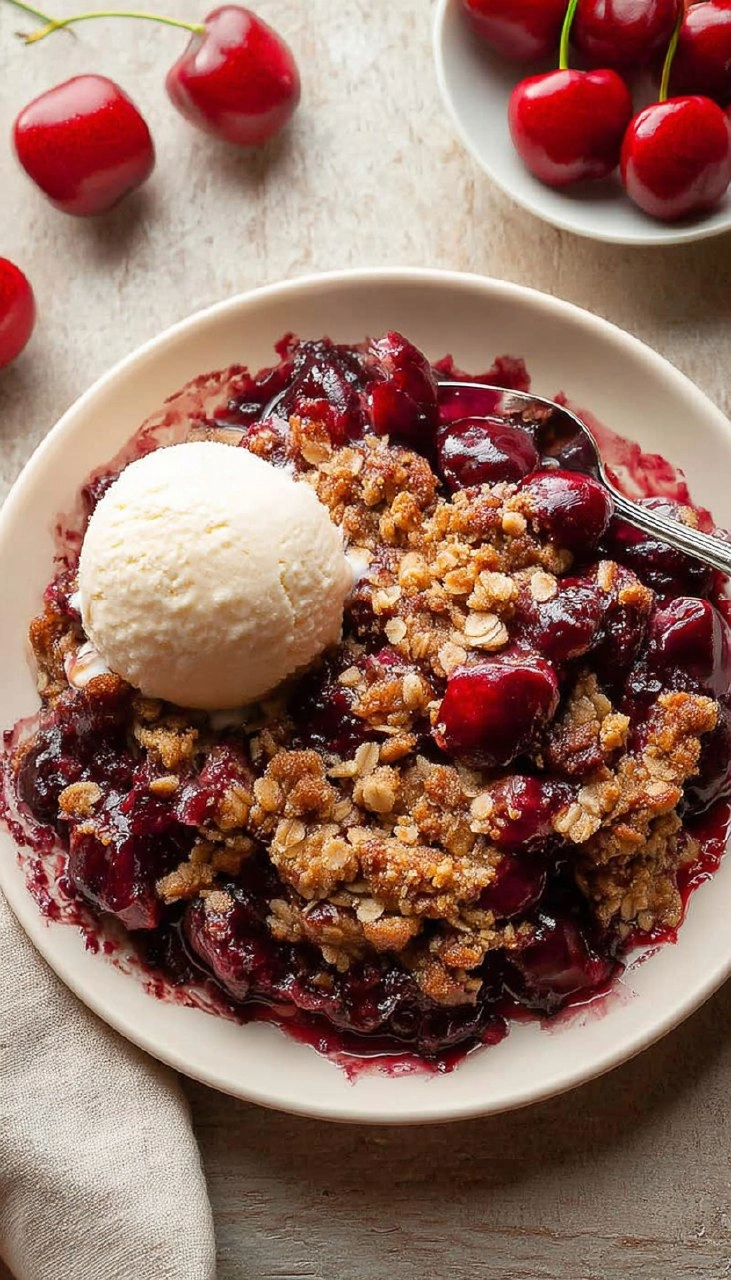
The rich, warm aroma of cherries baking away with a crunchy, golden topping is simply irresistible. Homemade Cherry Crisp is a dessert that embraces simplicity yet delivers on taste in a big way. With its juicy fruit filling, that delightful crunch, and the subtle hint of spices, it’s the kind of dessert that feels like a cozy hug. Growing up, my family always gathered around for dessert after dinner, and this cherry crisp quickly became a cherished favorite. There’s just something so comforting about diving into a warm, fruity treat topped with a crispy layer, especially when accompanied by a scoop of vanilla ice cream.
Table of Contents
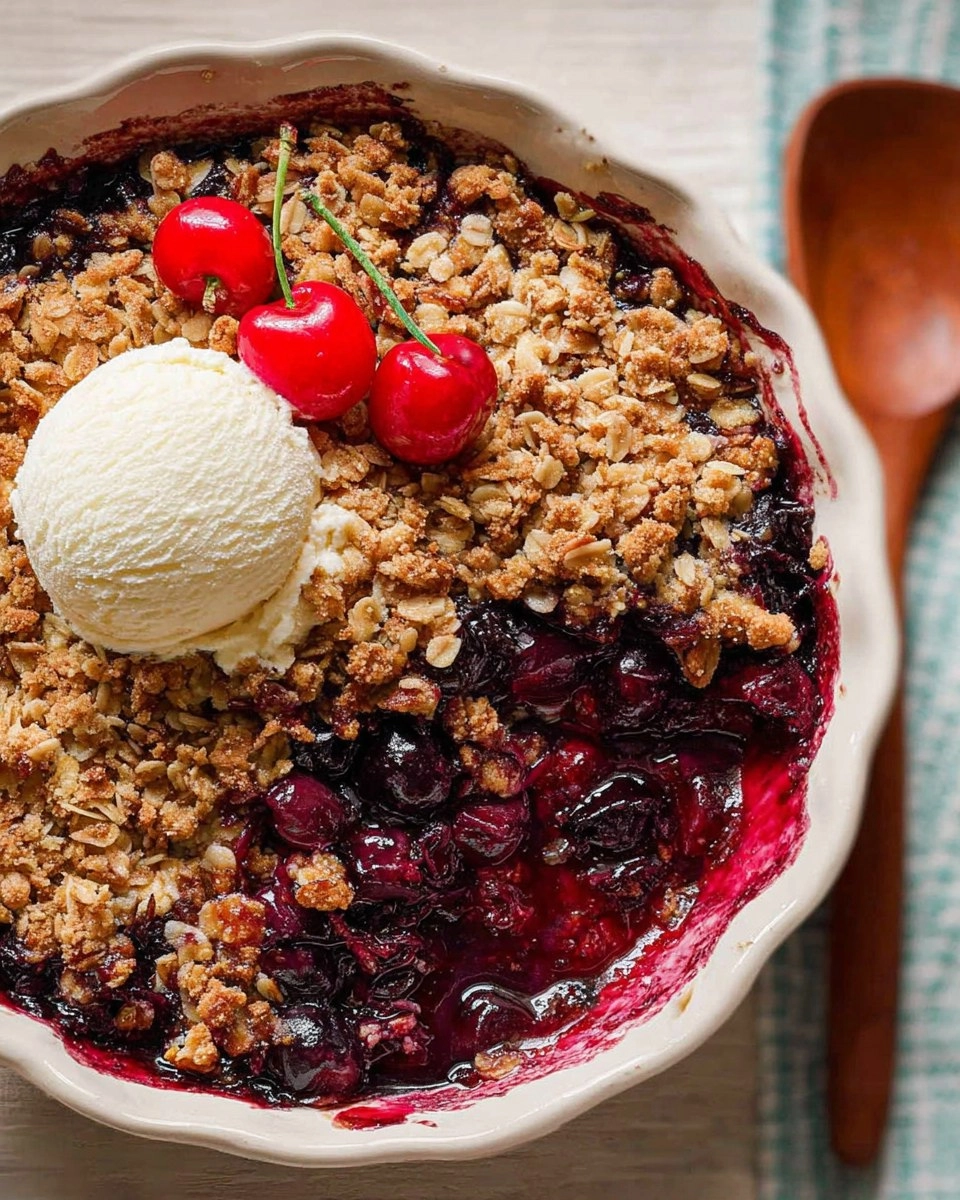
What’s even more delightful about homemade cherry crisp is how straightforward it is to create. All you need are fresh cherries and a handful of pantry staples to whip up a dessert that not only satisfies those sweet cravings but also brightens up gatherings. Unlike store-bought versions that can often miss the mark on flavor, this cherry crisp bursts with the natural sweetness of ripe cherries, complemented perfectly by its crunchy topping. So, gather your ingredients and get ready to enjoy a dessert that’s sure to win everyone over!
Why You’ll Love This Recipe
- Simple & Quick: This cherry crisp comes together in under an hour, making it an easy dessert option for any occasion!
- Irresistible Flavor: The combination of fresh cherries, a hint of cinnamon, and that crunchy topping creates a delightful battle of textures and flavors.
- Eye-Catching Appeal: The vibrant red of the cherries peeking through a golden brown topping makes this dish a showstopper on any table.
- Flexible Serving: Enjoy it warm with ice cream, at room temperature, or even for breakfast with your morning coffee.
- Diet-Friendly Options: Feel free to adapt with gluten-free oats or skip the bourbon for a kid-friendly version.
Ingredients You’ll Need
- 1/2 cup (100g) packed light or dark brown sugar: This adds depth of flavor and a lovely caramel note to the crisp.
- 6 tablespoons (46g) all-purpose flour: Essential for thickening the filling and binding the topping.
- 1/2 teaspoon ground cinnamon: A warm spice that enhances the flavor of the cherries.
- 6 tablespoons (85g) unsalted butter, very cold and cubed: Cold butter creates that perfect crumbly texture in the topping.
- 2/3 cup (57g) old-fashioned whole rolled oats: Adds a delightful chewiness and makes the topping satisfyingly crunchy.
- Optional: 1/4 cup (about 20g) sliced almonds: For an extra layer of nutty flavor and crunch.
- 5 cups (575g) halved pitted dark sweet cherries*: The star of the show! Use fresh cherries for the best flavor, or frozen if they are out of season.
- 1/2 cup (100g) granulated sugar: Balances the tartness of the cherries.
- 3 tablespoons (21g) cornstarch: Thickens the cherry filling for the perfect texture.
- 1 teaspoon pure vanilla extract: Enhances the sweetness and depth of flavor.
- 1/4 teaspoon almond extract: A little goes a long way in elevating the flavor profile.
- Pinch of salt: Helps to round out all the flavors beautifully.
- Optional: 2 tablespoons (30g/ml) bourbon*: Adds a deeper flavor dimension to the filling; it’s totally optional but worth a try!
How to Make Homemade Cherry Crisp
- Preheat the Oven: Start by preheating your oven to 350°F (177°C). Lightly grease a 9-inch round or square baking dish, then set it aside.
- Prepare the Topping: In a medium bowl, whisk together the brown sugar, all-purpose flour, and ground cinnamon. Cut the cold butter into small cubes and mix it into the dry ingredients using a pastry cutter or a food processor until the mixture resembles coarse crumbs. Stir in the old-fashioned oats and sliced almonds if you’re using them. Place the topping in the freezer while you prepare the cherry filling.
- Make the Filling: In a large bowl, combine the halved pitted dark sweet cherries, granulated sugar, cornstarch, vanilla extract, almond extract, a pinch of salt, and bourbon if you’re feeling adventurous. Mix them thoroughly until everything is well-coated, then pour the filling into the prepared baking dish, spreading it out evenly.
- Assemble the Crisp: Once the filling is ready, take the topping from the freezer and sprinkle it evenly over the cherry mixture. Don’t worry about it being perfect; that rustic look adds to the charm of the crisp!
- Bake: Place your baking dish into the preheated oven and bake for 45–48 minutes. You’ll know it’s ready when the topping turns golden brown and the cherry juices start bubbling around the edges. Once baked, remove it from the oven and let it cool on a rack for at least 5–10 minutes. Enjoy it warm, or at room temperature for a delightful treat throughout the day.
Storing & Reheating
Store any leftover cherry crisp at room temperature for a couple of hours, but if you’re keeping it for longer, refrigerate it in a covered container for up to 5 days. Should you want to freeze it, wrap the crisp tightly and store it in the freezer for up to 3 months. When you’re ready to enjoy it again, simply reheat individual servings in the oven at 350°F (177°C) for around 10-15 minutes or until warmed through. Do keep in mind that while the flavors will remain delicious, the crisp topping may not be quite as crunchy as when freshly baked.
Chef’s Helpful Tips
- To avoid a soggy bottom, make sure your cherries are well-drained before mixing in the sugar and cornstarch.
- Using cold butter is essential for achieving the perfect crumbly topping, so keep it in the fridge until you’re ready to use it.
- Timing is key! Keep an eye on the crisp as it bakes. If the top starts to brown too quickly, cover it loosely with aluminum foil to prevent burning.
- Feel free to swap in other fruits like blueberries, peaches, or apples depending on the season—a cherry crisp is a versatile dessert!
- For a more complex flavor, consider adding a splash of lemon juice to the cherry filling for brightness.
Deliciousness in a dish is what homemade cherry crisp is all about. If you’re looking for a dessert that’s not only easy to make but also fills your kitchen with fantastic aromas, this recipe will surely do the trick. The crunchiness of the topping perfectly balances the sweet and tart cherries, making every bite a joy. Don’t hesitate to try this recipe; each twist can make it uniquely yours. Whether you’re sharing with friends or simply treating yourself, this cherry crisp is a darling that deserves a spot on your table.
Recipe FAQs
Can I use frozen cherries for this recipe?
Absolutely! Frozen cherries work well; just ensure you thaw and drain them properly to prevent excess moisture. This way, you’ll still get that delicious filling without making your crisp soggy.
How do I make this cherry crisp gluten-free?
To make this recipe gluten-free, simply substitute the all-purpose flour with a gluten-free all-purpose blend and use certified gluten-free oats.
Can I prepare the cherry crisp in advance?
Yes! You can assemble the cherry crisp ahead of time, cover it, and keep it in the fridge for up to a day before baking. Just add an extra few minutes to the baking time if it’s straight from the fridge.
What do I serve with cherry crisp?
The possibilities are endless! A scoop of vanilla ice cream, a dollop of whipped cream, or some Greek yogurt will all complement the flavors beautifully. Enjoying it with a hot cup of coffee or tea also makes for a perfect pairing!
PrintMore Desserts & Appetizers Recipes
Did You Enjoy Making This Recipe? Please rate this recipe with ⭐⭐⭐⭐⭐ or leave a comment.
📖 Recipe Card
Homemade Cherry Crisp
- Prep Time: 10 minutes
- Cook Time: 45 minutes
- Total Time: 55 minutes
- Yield: 8 servings 1x
- Category: Desserts
- Method: Baking
- Cuisine: American
Description
This Homemade Cherry Crisp is a delightful treat featuring sweet cherries and a buttery oatmeal topping. Perfect for sharing, it’s simple to prepare and bakes to a golden perfection, making it the ultimate comfort food for dessert lovers.
Ingredients
- 1/2 cup (100g) packed light or dark brown sugar
- 6 tablespoons (46g) all-purpose flour
- 1/2 teaspoon ground cinnamon
- 6 tablespoons (85g) unsalted butter, very cold and cubed
- 2/3 cup (57g) old-fashioned whole rolled oats
- optional: 1/4 cup (about 20g) sliced almonds
- 5 cups (575g) halved pitted dark sweet cherries*
- 1/2 cup (100g) granulated sugar
- 3 tablespoons (21g) cornstarch
- 1 teaspoon pure vanilla extract
- 1/4 teaspoon almond extract
- pinch of salt
- optional: 2 tablespoons (30g/ml) bourbon*
Instructions
- Preheat your oven to 350°F (177°C) and lightly grease a baking dish.
- In a bowl, mix the brown sugar, flour, and cinnamon. Cut in the cold butter until crumbly. Stir in oats and almonds if desired, and freeze the topping mixture.
- Combine the cherries, sugar, cornstarch, vanilla, almond extract, salt, and bourbon (if using) in a large bowl. Mix well and spread into the prepared baking dish. Top with the frozen crumb mixture.
- Bake for 45-48 minutes until the topping is golden and juices are bubbling. Let it cool slightly before serving.
- Store any leftovers in the fridge for up to 5 days.
Notes
For extra flavor, add a scoop of vanilla ice cream on top when serving.
Use fresh cherries if possible for the best taste.
This crisp can also be served chilled or at room temperature.
Nutrition
- Serving Size: 1 slice
- Calories: 250
- Sugar: 18g
- Sodium: 100mg
- Fat: 10g
- Saturated Fat: 6g
- Unsaturated Fat: 3g
- Trans Fat: 0g
- Carbohydrates: 36g
- Fiber: 3g
- Protein: 3g
- Cholesterol: 30mg