Chocolate Ice Cream

Homemade chocolate ice cream is a delightful indulgence that brings joy to every scoop. Creamy, rich, and full of deep cocoa flavor, this treat is perfect for sweltering summer days or cozy winter nights when you just need a taste of something sweet. There’s truly nothing like the velvety texture and the luxurious chocolatey taste that you can customize and create in the comfort of your kitchen. Making your own chocolate ice cream gives you the freedom to control the ingredients, ensuring that each bite is just as you like it.
Table of Contents
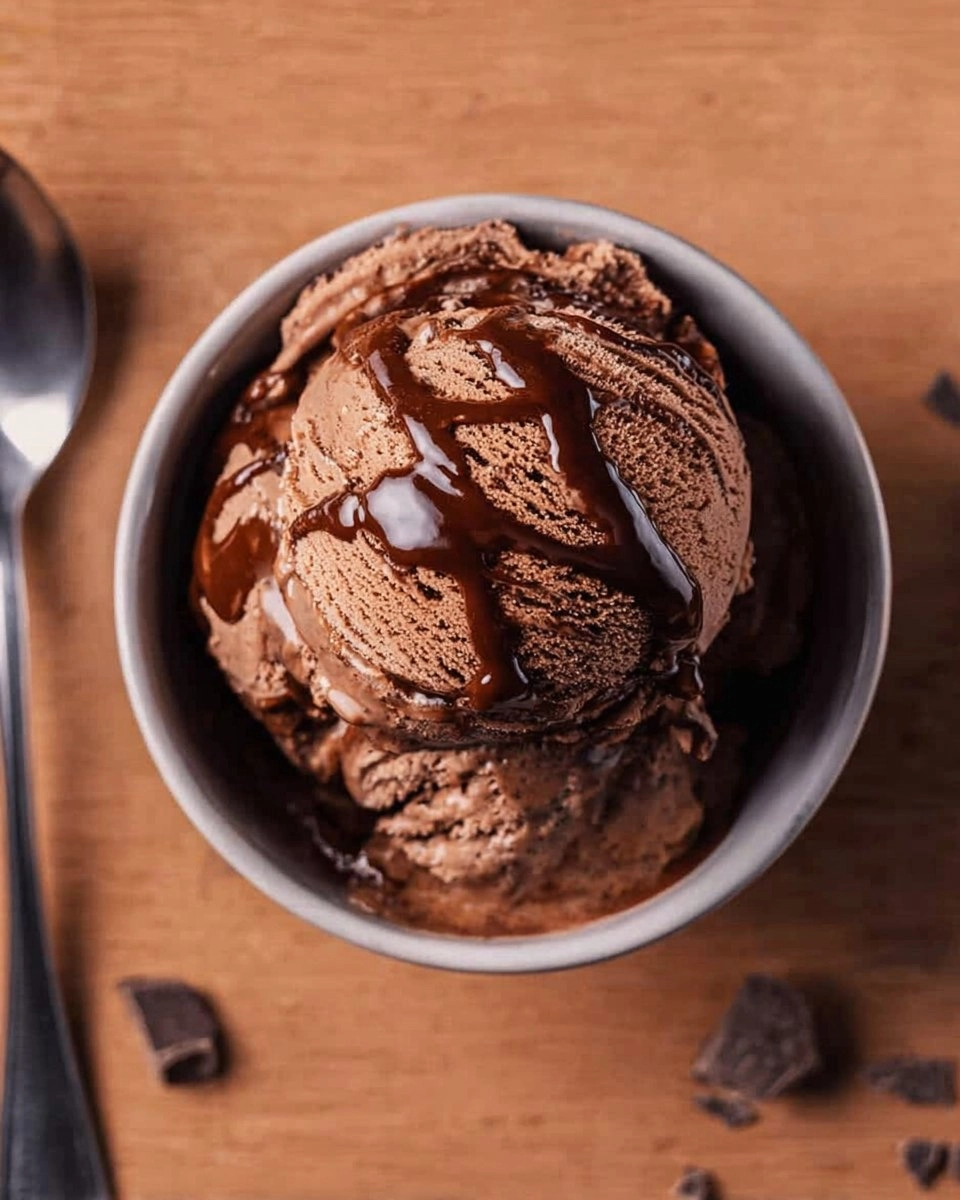
I can still remember the first time I whipped up a batch of this homemade chocolate ice cream. With every dash of cocoa powder and sprinkle of sugar, my kitchen turned into an oasis of sweet smells, memories flooding back as I licked the mixing spoon. This chocolate ice cream recipe brings a nostalgic nod to childhood summer days spent on front porches, enjoying a scoop or two after a long day of play. It’s incredibly satisfying to dig into a bowl and share this creamy creation with family and friends. Trust me, once you try it, you’ll never want to go back to store-bought again!
Why You’ll Love This Recipe
- Simple & Quick: With just about 30 minutes of active time, you can enjoy this delightful dessert.
- Irresistible Flavor: This ice cream is rich, creamy, and oh-so-chocolatey with a melt-in-your-mouth texture.
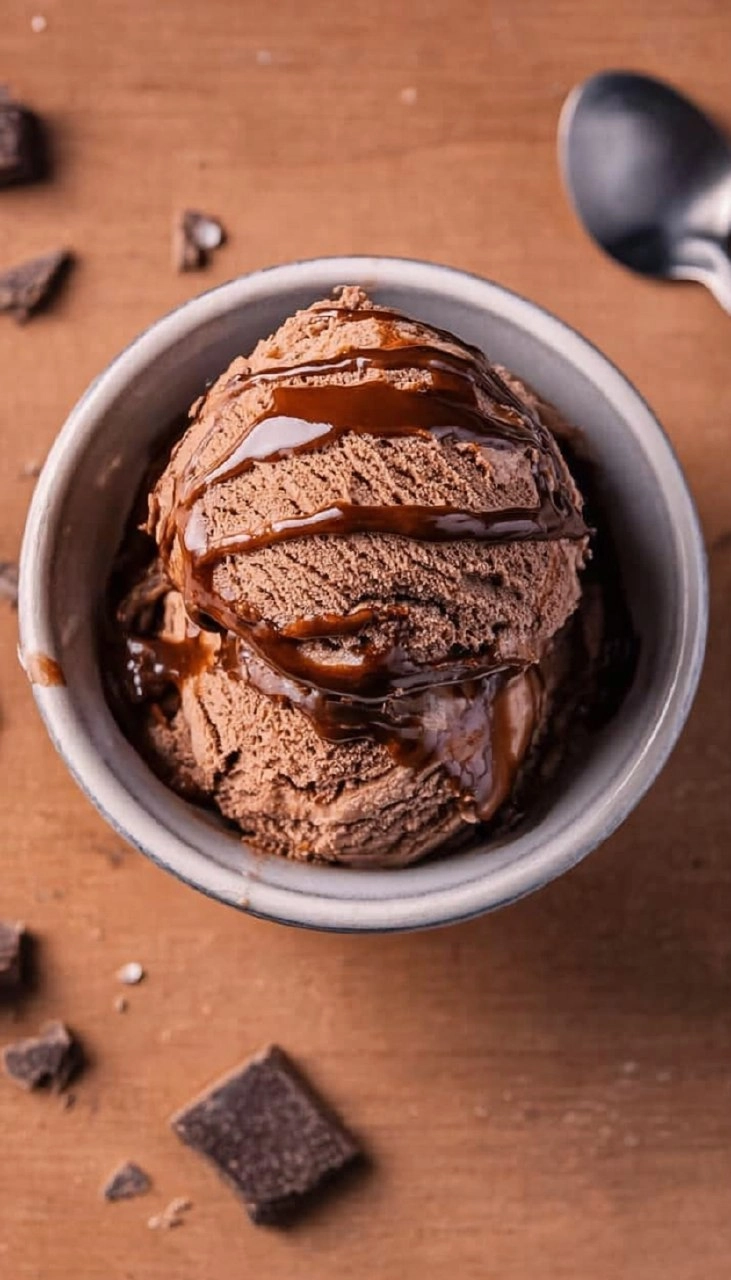
- Eye-Catching Appeal: Dark chocolate flecks and swirls of hot fudge make this ice cream irresistible.
- Flexible Serving: Perfect for brunch, parties, or satisfying midnight cravings, it’s suitable for any occasion.
- Diet-Friendly Options: Easily adjustable to suit various diets, with rich options for creamy chocolate lovers.
Ingredients You’ll Need
- 1½ cups heavy cream: For that rich and creamy texture, heavy cream is a must. You can substitute it with coconut cream for a dairy-free version.
- 1½ cups whole milk: Whole milk provides a smooth base. If you’re looking to lower the fat, you might try 2% milk, but it may alter the final creaminess.
- ½ cup granulated sugar: This sweetens the mixture perfectly. You can use coconut sugar for a different flavor profile.
- 3 tablespoons cocoa powder: Use unsweetened cocoa powder for maximum chocolate flavor. Dutch-processed cocoa will also yield a richer taste.
- 2 tablespoons light corn syrup: This optional ingredient helps to keep the ice cream smooth. You can use honey or agave syrup for a similar effect.
- 1/4 teaspoon fine sea salt: Salt enhances the sweetness of the chocolate.
- 4 large egg yolks: They create a custard base adding richness and depth. For a vegan option, try using silken tofu blended until smooth.
- 1 tablespoon vanilla extract: Quality vanilla extract is key for flavor. You can also substitute with vanilla bean paste for a gourmet touch.
- 4 oz dark chocolate, chopped: Using high-quality chocolate is crucial here. Choose a bar with at least 70% cacao for a deep chocolate taste.
- ½ cup hot fudge sauce, optional: This adds a delightful swirl and extra indulgence. Use store-bought or pick your favorite homemade recipe.
How to Make Chocolate Ice Cream Recipe
Heat Dairy: In a medium saucepan, combine the 1½ cups heavy cream, 1½ cups whole milk, ½ cup granulated sugar, 3 tablespoons cocoa powder, 2 tablespoons light corn syrup (if using), and 1/4 teaspoon fine sea salt. Heat over medium, stirring occasionally, until the mixture is steaming but not boiling. Keep an eye out for tiny bubbles forming; this indicates it’s ready.
Whisk Yolks: In a separate bowl, beat 4 large egg yolks until they are smooth and pale in color. This step is crucial for creating the ice cream’s custard base.
Melt Chocolate: In another small bowl, add the 4 oz dark chocolate (chopped or chips). Pour one big ladleful of the hot milk mixture over the chocolate and let it sit to melt. Stir it gently to encourage melting.
Temper Eggs: Slowly drizzle a ladleful of the hot milk mixture into the yolks, whisking constantly. This helps avoid scrambling. Repeat with several more spoonfuls of the hot cream until the yolks are tempered. Then pour this mixture back into the saucepan. Cook for about 30 seconds, stirring gently, until the mixture reaches 170-175 degrees F, or until it thickens slightly and coats the back of a spoon. Make sure it doesn’t come to a boil!
Combine: Remove from heat. Stir in the melted chocolate and 1 tablespoon vanilla extract until completely blended. For an ultra-smooth texture, strain the mixture through a fine-mesh sieve into a clean container to remove any bits of cooked egg.
Chill: Allow the mixture to cool to room temperature before refrigerating for at least 4 hours or, ideally, overnight. This chilling process develops flavor and ensures a smoother ice cream.
Churn: Once the custard has chilled, churn it in an ice cream maker according to the manufacturer’s instructions. The mixture will thicken and expand as it churns, becoming creamy.
Fudge Swirl and Freeze: Transfer half of the churned mixture to an ice cream container. Spoon 3 tablespoons of warmed hot fudge sauce over the top in a line, then use a knife to gently swirl it into the ice cream. Pour the remaining ice cream over the top and add another drizzle of fudge sauce. Freeze for at least 4 hours to allow it to set and become scoopable.
Serve: Serve your homemade chocolate ice cream in a charming dish or, if you’re feeling adventurous, make homemade waffle cones for an extra touch of homemade fun!
Storing & Reheating
To store your chocolate ice cream, keep it in an airtight container in the freezer. It can last up to 3 months if stored properly. Be sure to cover it well to prevent freezer burn. When you’re ready to enjoy, simply scoop out what you’d like and let it sit at room temperature for about 5-10 minutes to soften slightly. This ensures it’s perfectly creamy when you serve!
Chef’s Helpful Tips
- Make sure to use room temperature eggs for easier mixing.
- Avoid boiling the custard, as this can cause the eggs to scramble, resulting in a gritty texture.
- If the ice cream is too hard after freezing, just let it sit out for a few minutes to soften before scooping.
- For a smoother texture, churn until it is thick enough to hold soft peaks and then freeze it in a wide, shallow container for faster freezing.
- Experiment with different mix-ins like nuts, chocolate chips, or even marshmallows for added texture and flavor.
There’s no denying that homemade chocolate ice cream is a joy to create and share. The lush flavor and creamy texture simply can’t be beat. Once you experience the difference of homemade, you’ll find it’s hard to enjoy store-bought again. So, mix, churn, and create your dream scoops, all while inviting friends and family to join in the fun. Try this recipe and let the smooth, rich, and decadent world of chocolate ice cream sweep you off your feet—scoop by delicious scoop.
Recipe FAQs
Can I use milk alternatives in this recipe?
Absolutely! You can substitute whole milk with non-dairy milk, such as almond milk or oat milk. Keep in mind that the final texture may differ slightly, but it can turn out just as delicious!
What if I don’t have an ice cream maker?
No worries! You can still make delicious chocolate ice cream without one. Pour the custard into a freezer-safe container, and every 30 minutes, stir it with a fork for about 3-4 hours. This helps achieve that creamy consistency.
How can I make my chocolate ice cream even richer?
For richer flavor, consider using a combination of both dark chocolate and milk chocolate. This adds complexity to your ice cream. Alternatively, double the amount of chocolate for an extra chocolatey treat!
How long does homemade chocolate ice cream last?
When stored in an airtight container in the freezer, your homemade chocolate ice cream is best enjoyed within 2-3 months for optimal freshness. After that time, it may become icy and lose its creamy texture.
PrintMore Desserts & Appetizers Recipes
- Valentine’s Day Coconut-Chocolate Keto Bars
- Cottage Cheese Brownies Delicious High Protein
- Greek Yogurt Chocolate Pudding
- Strawberry Shortcake Cookies
- Funfetti Cookies
Did You Enjoy Making This Recipe? Please rate this recipe with ⭐⭐⭐⭐⭐ or leave a comment.
📖 Recipe Card
Chocolate Ice Cream
- Prep Time: 30 minutes
- Cook Time: 30 minutes
- Total Time: 1 hour
- Yield: 12 servings 1x
- Category: Desserts & Appetizers
- Method: Churning
- Cuisine: American
Description
This Chocolate Ice Cream features a delightful blend of rich flavors and creamy textures, using simple ingredients like heavy cream, milk, and dark chocolate. Perfect for that sweet indulgence at home, it’s a great way to enjoy a classic dessert any time of the year!
Ingredients
- 1½ cups heavy cream
- 1½ cups whole milk
- ½ cup granulated sugar
- 3 tablespoons cocoa powder
- 2 tablespoons light corn syrup
- 1/4 teaspoon fine sea salt
- 4 large egg yolks
- 1 tablespoon vanilla extract
- 4 oz dark chocolate, chopped
- ½ cup hot fudge sauce
Instructions
- In a medium saucepan, combine the cream, milk, sugar, cocoa powder, corn syrup, and salt. Heat over medium, stirring occasionally, until steaming but not boiling.
- In a separate bowl, beat the egg yolks until smooth.
- In another small bowl, add the chopped chocolate. Pour one ladleful of hot milk over the chocolate and set aside to melt.
- Slowly drizzle a ladleful of hot milk mixture into the yolks, whisking constantly. Continue with several more spoonfuls of hot cream. Then pour back into the saucepan.
- Cook for about 30 more seconds, until the mixture reaches 170-175 degrees F and thickens slightly. Do not let it boil.
- Stir in melted chocolate and vanilla extract, then strain through a fine-mesh sieve into a clean container.
- Chill in the refrigerator for at least 4 hours or ideally overnight.
- Churn the cooled custard in an ice cream maker according to the manufacturer's instructions.
- Transfer half of the mixture to an ice cream container. Spoon 3 tablespoons of warmed fudge sauce over the top, swirling it into the ice cream. Add the remaining mixture and top with another layer of fudge drizzle. Freeze for at least 4 hours until firm and scoopable.
- Serve in a homemade waffle cone if desired.
Notes
If you don’t have an ice cream maker, you can still make this recipe by mixing the custard in a bowl every 30 minutes while it freezes, until firm.
For an extra chocolatey punch, consider adding chocolate chips or chunks when churning.
Customize by adding your favorite toppings or swirling in different sauces.
Nutrition
- Serving Size: 1/2 cup
- Calories: 300
- Sugar: 24g
- Sodium: 40mg
- Fat: 20g
- Saturated Fat: 12g
- Unsaturated Fat: 8g
- Trans Fat: 0g
- Carbohydrates: 28g
- Fiber: 1g
- Protein: 4g
- Cholesterol: 100mg